Here's a tip for dealing with noise in shadow areas of images. This technique assumes you're satisfied with midtone and highlight quality but have unacceptable noise levels (luminance, chrominance, or both) in shadows. This description presumes raw shooting and the use of Adobe Camera Raw (ACR) for image development, but can be adapted for other environments.
In a nutshell, you layer two versions of the image. The bottom layer is the normal exposure with noisy shadows. The layer above it is an overexposed version, which is tonally adjusted. Blending is used to selectively allow only the adjusted noise-free shadow tones of the top layer to be visible while the midtones and highlights of the bottom correctly-exposed layer are used.
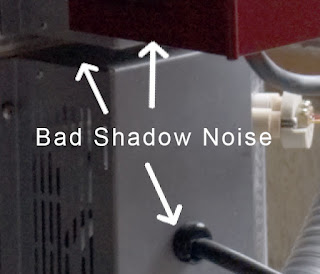
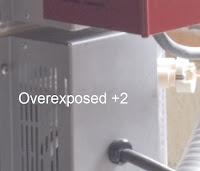
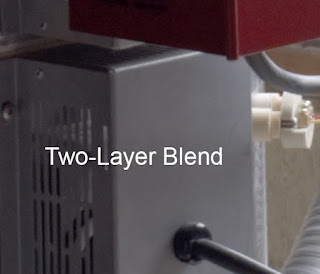
The example images shown are crops at 2X scaling and have levels cranked up so you can clearly see what's going on. (Click to view full size.) First, the noisy normally exposed image:
You will shoot two exposures of your scene, one correctly exposed, the other 2 stops overexposed. (We'll look at a variation of this technique using only one image later.)
The overexposed image has what were the shadow tones of the correctly-exposed image placed in your camera's midtone sweet spot where it should be relatively noise-free. In ACR, develop your correctly-exposed image normally and then apply the same ACR settings to the overexposed version with one exception: move the Exposure slider to -2.0 to move the overexposed midtones down to the shadow region.
The shadow tones will now look flat because they don't have that nice S-curve adjustment at the toe that's applied in the raw processing.

Apply a contrast adjustment yourself, either in ACR or later with a Curves adjustment. Your highlights will be blown out but you don't care because you won't be using the highlight parts of this image.
Bring the adjusted exposure image version into a separate layer above the correctly-exposed image layer. They need to register precisely—jigger them if needed. (Pardon the sophisticated technical terminology.) Now you'll do some magic to only keep the shadow regions of the upper layer.
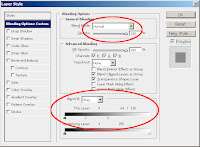
Leave the blending mode at "Normal". Go to "Blending Options" for this layer and adjust the "Blend If" setting at the bottom as follows. Leave the drop-down setting at "Gray"; drag the right slider on "This Layer" toward the left to around 128; alt-click the slider to split it and drag farther left to about 64. What you've done is made the brighter regions of the layer transparent and the shadows opaque, with a nice gradual transition between the two to make it look natural. Poof!, instantly-improved shadow tones less the noise. Tweak the "Blend If" sliders to optimize for the particular image you are working on. There's quite a remarkable improvement in the quality of shadow tones of the blended image.
For images that you don't have, or can't shoot, the second (overexposed) version of the image, you can try the same technique from a different angle. Duplicate the original image and apply an aggressive noise reduction on it using one of the standard noise-reduction tools. Because you'll only be using the shadow tones, you can be quite aggressive with the noise reduction as the introduced artifacts won't be as noticeable in the shadows. Put the noise-reduced version on a layer above the original, and apply the blending technique as described above. You'll get the benefit of strong noise reduction in the shadow tones without the image degradation in the midtones and highlights that might be introduced by noise reduction.